api_webservice_adaptor [TAST DokuWiki ]

User Tools

Site Tools


Sidebar

First steps in TAST

What is UML

Computer setup for TAST use

FAQ

Recognized Issues

TAST tool Menu

TAST Adaptors

Adaptors examples

TAST Integrations

Interesting features

Documentation of technical administration

Modeling recommendations

Training in the TAST tool

api_webservice_adaptor

API/WebService Adaptor

Introduction

This adapter is used to run tests of Web Services: REST, SOAP and others.

Configuration

In the adapter setup we must include all the data that we consider descriptive of the service in general and that apply to all your requests. So that the user does not have to pass them in each message of the diagram. As for example the base url of the service, headers or the authentication method.

Setup Parameters of the REST Adaptor

  • EndPoint: Base URL to access the service.
  • Keep_Session: Indicates whether the session should be maintained between requests to the service. If it is checked, the adapter will add the cookies it receives in the responses to the requests it makes.
  • IsSecure: Indicates if requests to the service were sent over the http or https protocol.
  • Service Charset(Opt.): For setting the charset you will use in a sHTTP service (e.g. REST). Words and sentences in text are created from characters. A character encoding provides a key to unlock (ie. crack) the code. Thus, the charset is the encoding information, which is to say the set of mappings between the bytes in the computer and the characters in the character set. Without the key, the data looks like garbage. An example of charset are UTF-8 or UTF-16. It uses Cp1047 by default.
  • WADL_File (Opt.): This is a machine-readable XML description of HTTP-based web services (e.g. REST). The aim of the WADL file is to model the resources provided by a service and the relationships between them.
  • Headers: Allows adding headers to all the requests that are sent to the service.
  • Authentication Type: Allows selecting the type of authentication that the service requires. Once selected, it allows us to enter the necessary data for the type of authentication selected. No authentication type is used by default.

Predefined Functions for REST in the Web Adaptor

  • deleteRest(resource, headers)
    • Description: It allows the configuration of an HTTP request of type Delete.
    • Resource: Indicates the resource within the EndPoint on which the request will be made.
    • Headers: Indicates the headers that must be added to the request.
    • Charset: To choose what charset the user wants.
    • Body: Indicates que content of the parameter.
  • getALLJSONElementValueByTagname(ResponseName, JsonTagName)
    • Description: If the content of the response to a request is JSON, this function allows to retrieve all the values of the element linked to the tagName as an array of values represented with a tastRowValues object. The result is presented with the values separated by the character |, in the field Message / Result / Value.
    • ResponseName: Indicate the name which the Http Response was generated.
    • JSonTagName: Tagname expression used to identify the element.
  • getALLXMLElementValueByTagName(StepResponse, ElementTag)
    • Description: If the content of the response to a request is XML, this function allows to retrieve all the values of the element linked to the tagName as an array of values represented with a tastRowValues object. Instead of returning only one element (the first), this PF returns a list of all elements.
    • ResponseName: Indicate the name which the Http Response was generated.
    • ElementTag: XML´s tag used to identify the element.
  • getCookieValue(StepResponse, Cookie)
    • Description: Retrieve the value of the indicated cookie.
    • ResponseName: Indicate the name which the Http Response was generated.
    • Cookie: Indicates Cookie´s name to retrieve.
  • getElementsCountByJsonPath(JsonPath, ResponseName): Returns the number of elements that have the same JsonPath.
    • JsonPath: The JsonPath to search for.
    • ResponseName: The name under which the HTTP response was generated.
  • getElementsCountByTagName(tagName, ResponseName): Returns the number of elements that have the same tag name.
    • tagName: The tag name to search for.
    • ResponseName: The name under which the HTTP response was generated.
  • getElementsValueByJsonPath(JsonPath, ResponseName): Returns all elements that have the same JsonPath.
    • JsonPath: The JsonPath to search.
    • ResponseName: The name under which the HTTP response was generated.
  • getHeaderValue(StepResponse, Header)
    • Description: It allows to obtain the value of a received header in an HTTP response.
    • ResponseName: Indicate the name which the Http Response was generated.
    • Header: The name of the header from which you want to extract the value.
  • getHTMLElementValueByXpath()
    • Description: If the content of the response to a request is HTML, this function allows to retrieve a value of an element, using to identify the element an XPath expression.
    • ResponseName: Indicate the name which the Http Response was generated.
    • XPathExp: XPath expression used to identify the element.
  • getJSONElementValueByJsonPath(StepResponse, JSonPathExp)
    • Description: If the content of the response to a request is JSON, this function allows to retrieve a value of an element used to identify the element the JsonPath. If there are more than one element, returns the first.
    • ResponseName: Indicate the name which the Http Response was generated.
    • JSonPathExp: JSonPath expression used to identify the element.
  • getJSONElementValueByTagName(StepResponse, TagnameExp)
    • Description: If the content of the response to a request is JSON, this function allows to retrieve a value of an element used to identify the element the TagName. If there are more than one element, returns the first. The result is presented with the values separated by the character |, in the field Message / Result / Value.
    • ResponseName: Indicate the name which the Http Response was generated.
    • JSonTagname: Tagname expression used to identify the element.
  • getResponseBody:
  • getResponseStatus(StepResponse)
    • Description: Allows to retrieve response´s Http status code.
    • ResponseName: Indicate the name which the Http Response was generated.
  • getResponseTime: Returns the time taken in milliseconds to receive the response to a request. To identify the response it receives a parameter with the name of the HttpResponse variable from which we want to obtain the information.
  • getRest(resource, headers, parameters)
    • Description: It allows to configure an HTTP request of type Get.
    • Resource: Indicates the resource within the EndPoint on which the request will be made.
    • Headers: Indicates the headers that must be added to the request.
    • Parameters: Indicates the parameters that must be added to the URL of the request.
    • Charset: To choose what charset the user wants.
  • getXMLElementValueByTagName(StepResponse, ElementTag)
    • Description: If the content of the response to a request is XML, this function allows to retrieve a value of an element using the tag to identify it. If there are more than one element, returns the first.
    • ResponseName: Indicate the name which the Http Response was generated.
    • ElementTag: XML´s tag used to identify the element.
  • getXMLElementValueByXPath(StepResponse, XPathExp)
    • Description: If the content of the response to a request is XML, this function allows to retrieve a value of an element, using to identify the element an XPath expression. Also, it allows to search values in responses with XHTML content type.
    • ResponseName: Indicate the name which the Http Response was generated.
    • XPathExp: XPath expression used to identify the element.
  • patchRest(resource, headers, content-type, body)
    • Description: It allows you to configure an HTTP request of type Patch.
    • Resource: Indicates the resource within the EndPoint on which the request will be made.
    • Headers: Indicates the headers that must be added to the request.
    • Content-type: HTTP standard header that indicates the type of content that is added to the body of the request.
    • Body: Content of the Http request.
  • postRest(resource, headers, content-type, body)
    • Description: It allows you to configure an HTTP request of type Post.
    • Resource: Indicates the resource within the EndPoint on which the request will be made.
    • Headers: Indicates the headers that must be added to the request.
    • Content-type: HTTP standard header that indicates the type of content that is added to the body of the request.
    • Body: Content of the Http request.
  • putRest(resource, headers, content-type, body)
    • Description: Allows you to configure an HTTP request of type Put.
    • Resource: Indicates the resource within the EndPoint on which the request will be made.
    • Headers: Indicates the headers that must be added to the request.
    • Content-type: HTTP standard header that indicates the type of content that is added to the body of the request.
    • Body: Content of the Http request.
  • responseBodyContainsText(responseName, searchValue)
    • Description: Search in the body field of the response (stepResponse), if there is any match with the string of parameter searchValue. True return if affirmative.
    • ResponseName: Indicate the name which the Http Response was generated.
    • SearchValue: Text to search inside body of response.
  • setBasicAuthentication(user, password)
    • Description: It allows to configure the authentication scheme of the requests that are sent to the EndPoint as BasicAuthentication. It overwrites the security setting done in the adapter setup.
    • User: User code used as credential.
    • Password: Password to present as credential.
  • setBearerTokenAuthentication(token)
    • Description: It allows to configure the authentication scheme of the requests that are send to the endpoint as Bearer Token Authentication Scheme. It overwrites the security setting done in the adapter setup.
    • Token: Token´s value that will be presented as credential.
  • setDigestAuthentication(user, password, realm, nonce, algorithm, Qoq, NonceCount, ClientNonce, Opaque)
    • Description: It allows to configure the authentication scheme of the requests that are send to the endpoint as Digest Authentication Scheme. It overwrites the security setting done in the adapter setup.
    • User: Username used as credential.
    • Password: Password to present as credential.
    • Realm: Security domain on which security validation must be performed. It is optional, if it is not known, the adapter will try to perform the validation with the data obtained from the response to the challenge.
    • Nonce: Nonce returned by the server. It is optional, if it is not known, the adapter will try to perform the validation with the data obtained from the response to the challenge.
    • Algorithm: Algorithm used for encryption. It is optional, if it is not known, the adapter will try to perform the validation with the data obtained from the response to the challenge.
    • Qoq: Quality of the protection code. It is optional, if it is not known, the adapter will try to perform the validation with the data obtained from the response to the challenge.
    • NonceCount: NonceCount associated with the request. It is optional, if it is not known, the adapter will try to perform the validation with the data obtained from the response to the challenge.
    • ClientNonce: Nonce generated by the client. It is optional, if it is not known, the adapter will try to perform the validation with the data obtained from the response to the challenge.
    • Opaque: Opaque returned by the server. It is optional, if it is not known, the adapter will try to perform the validation with the data obtain
  • setNoneAuthentication()
    • Description: It allows to configure the authentication method of the requests that are sent to the EndPoint as requests without authentication scheme. It overwrites the security setting done in the adapter setup.

Base URL

It would be the part of the URL that is common to all the requests or requests about that web service, so that the user does not have to enter it in each message that he configures as a request service.

Authentication and authorization data

It is understood that the first interaction that the adapter must perform with the web service will be the authentication and authorization. Currently there are several different standard methods to perform this step and other owners that I would leave to develop on demand, that is, if we find the need.

To emphasize that they are not authentication-authorization methods of the Web Rest services, rather they are associated with the Http protocol, so the development should be oriented to be reused by the Html GUI adapter and the Webservices SOAP adapter, if in the future intends to access any Web application that uses any of these methods to authenticate-authorize itself.

Authentication Types

To administer the authentication_type field exists a combo field, which contains a defined authentication that must be enumerated to the user for selection.

Now comes the enumeration of the authentication types, make a brief description of them and think what parameters we might need.

  • No Authorization (None Auth): If the user selects this method, it is not necessary to authenticate to use the service.
  • Basic Authorization (Basic Auth): The simplest method only requires the user and password parameters. https://en.wikipedia.org/wiki/Basic_access_authentication
  • Digest Authorization (Digest Auth): This method is a bit stronger because the key is encrypted and the user, in the postman tool when you select this type of authentication requests the following parameters:

    • User
    • Password

      And as optional (default values are used if the user does not provide them) the following:

    • Realm: Security domain against which to authenticate.
    • Algorithm: Encryption algorithm. MD5 or MD5-sess.
    • Nonce: Code that the server issues in the response when a request is not authorized. It is unique per session and must be included in the following requests.
    • Qop: Quality of protection, the possible values are auth (more common) or auth-int (authorization with integrity) I think less supported and used.
    • Nonce Count: Number of request made to the server with the same nonce, its obligation depends on the value assigned to Qop.
    • Opaque: It is a value returned by the server in the first unauthorized response, and must be added without modifying all subsequent requests to the server. https://en.wikipedia.org/wiki/Digest_access_authentication
  • OAuth 1.0: This method, open Authorization, is more modern to create a first standard related to authentication. OAuth 2.0 is used more but we could find a service that uses it. In Postman the following parameters are requested:

    • ConsumerKey: A value used by the consumer of the service to identify himself to it.
    • ConsumerSecret: Token used by the consumer to validate their ownership of the ConsumerKey.
    • Access Token: Access Token.
    • Token Secret: Another key to ensure ownership of the access token.
      And as optional parameters (default values if user does not enter):
    • Signature Method: The signature method used by the consumer to sign the requests.
    • Timestamp: A timestamp is added to the request.
    • Nonce: Random string generated by the client, will be added to all the requests.
    • Realm: Indicates the security domain that performs authentication. https://es.wikipedia.org/wiki/OAuth

Functions

Below is the list of Predefined Functions for sending requests to the server provided by the adapter, and parameters necessary for its execution. In rest the types of requests correspond with the different methods / verbs contemplated in the HTTP protocol. In principle there will be a function to form a request for each HTTP method. Another requirement is that variables in the diagram should be allowed to compose the different fields of the request.

The existing methods are:

  • GET: It is used to read and retrieve the information of a resource on the server. It is probably the easiest to implement since all the most relevant data of the request appear in the URL of the request.
    • httpResponse = get (UrlBase, Resource, List Headers, List Parameters)
    • UrlBase = It would be obtained from the initialization of the adapter.
    • Resource = The resource you want to obtain.
    • List Headers = A list of headers to be added to the request, to be repeated on will write the values given in the adapter's setup.
    • List Parameters = List of parameters to add to the URL of the request in the form of key = value.
    • Example =
    • As we have said the get requests are used to retrieve the information associated with a resource on the server, the type of the recovered resource is reported in the media-type header, we could retrieve information with Json, Xml, Html, Pdf, Word, Excel format.
    • One of the issues that the function must answer is how to report the evidence of its correct execution, beyond including a message in the application log indicating whether it was executed correctly, we must consider the option of generating a file of evidences with the content of the response.
    • For example suppose a request get to the application whose result in the application itself is the download of a file Pdf or Excel, I believe that when running it in Tast and retrieve the file we should create it in the directory of evidences of the execution.
    • This is the simple screen in which the user includes headers and headers as a single String that will be parsed by the adapter to decompose it, another design could be made in which the user would be adding parameters or headers at will.
  • POST: It is used to create a resource on the server, with the information contained in a form, or in a Json, XML or other file. That is, the way in which the data is transmitted in the body of the request may vary, and it is necessary to allow the user to indicate it in some way in order to build the request. It is the header content_type.
    • httpResponse = post (UrlBase, Resource, List Headers, Content Type, Data)
    • In this case, the data could be represented in a Json or XML file that the user should either be able to upload to the application or cut and paste it in some editor, as in the case of the Queries or the Javascript code.
    • In the case of using forms, the types X-WWW-FORM-URLENCODED or FORM-DATA the requirements change and the user should provide us with a series of parameters in the form of a key value.
    • As well as in some cases attach files to the request.
  • PUT: It is used to update the information related to a resource on the server. Similar to post in requirements.
    • httpResponse = put (“UrlBase, Resource, List Headers, Content Type, Data)
  • DELETE: It is used to delete a resource on the server.
    • httpResponse = delete (“UrlBase, Bank, User, Account, balance”)
  • HEAD: Similar to GET, but the response does not contain the body, the data, only contains the header.

The problem of session Maintenance

As you know, Http is a stateless request / response protocol, but sometimes workflows force several requests to be related as if they were from the same client. That is, keep the session between client and server throughout the workflow. It is usually done with cookies, although it can also be done through headers.

In any case, this is transparent for the user, but the adapter must take this into account, since it must store the cookie sent by the server in the first request to add it to the subsequent Http requests in the diagram. Or in other cases through Tokens that are provided by the server after authenticating and that the client must include in a header in each request.

It is possible that the user must tell us whether to keep a session during the sending of several consecutive messages, and the mechanism that the server uses to do so. In SoapUi, when creating a test case, it offers us the possibility of marking a chek-box that indicates if we want to keep the session, just ask for no more data, I understand that you try to keep it transparent to the user.

The problem of the validation of the Response

Data recovery Functions of the Response.

The above functions are aimed at validating the response obtained by the request, but we have not yet provided the user with functions that allow him to retrieve the information contained in the response.

As we have indicated previously some of these functions could be:

  • Integer Code = GetStatusCode (httpResponse).
    • Returns the return code as a variable to the diagram.
  • Integer timeMilis = GetResponseTime (httpResponse).
    • Returns the time spent processing the request.
  • String headerValue = GetHeaderValue (httpResponse, String HeaderKey).
    • Returns the value contained in the header indicated by the HeaderKey parameter.
  • String propertyValues = GetXPathPropertyValue (httpResponse, String XPathExp);
    • This function would return the value or list of values contained in the response elements that are macheted with the Xpath expression introduced as a parameter. If there are several elements in the document that meet the condition, all values separated by some character would be concatenated. It only applies when the response is in XML format.
  • String propertyValues = GetJSonPathPropertyValue (httpResponse, String JSonPathExp);
    • Similar to the previous function but using the JSonPath standard to navigate over the response data. It only applies to JSon type responses. In principle we will develop more functions of this type that allow retrieving the data of the response and introduce them as variables in the flow of execution of the diagram, in case they want to be used as input values to other messages in the diagram.

The problem of session Maintenance

As you know, Http is a stateless request / response protocol, but sometimes workflows force several requests to be related as if they were from the same client. That is, keep the session between client and server throughout the workflow. It is usually done with cookies, although it can also be done through headers.

In any case, this is transparent for the user, but the adapter must take this into account, since it must store the cookie sent by the server in the first request to add it to the subsequent Http requests in the diagram. Or in other cases through Tokens that are provided by the server after authenticating and that the client must include in a header in each request.

It is possible that the user must tell us whether to keep a session during the sending of several consecutive messages, and the mechanism that the server uses to do so. In SoapUi, when creating a test case, it offers us the possibility of marking a chek-box that indicates if we want to keep the session, just ask for no more data, I understand that you try to keep it transparent to the user.

REST Mapping Assistant

The REST mapping assistant allows, from a diagram already stored, to modify those direct messages whose destination is an object mapped with the WebService adaptor.

Those messages that have mapped a predefined function can be executed as they would be executed when a test is launched. The execution generates data that will be presented to the user.

It is also possible to edit and execute assertions that have previously been associated with messages.

Prerequisites

For the REST mapping assistant to work perfectly it is necessary to include a prerequisite in the browser configuration. It is necessary to allow the opening of pop-ups under the URL of the application.

In Internet Explorer 11:

  • Open Tools:

  • Select Internet options from the drop-down.
  • Open the Privacy tab.
  • In the Item Blocker section, check whether Activate the pop-up blocker is activated.
  • If yes, click on the Settings button.
  • In the text box Website address that you want to allow, insert the base URL of the application.
    Example: if we are in the page https://TAST/opendiagram?id=5213 of our TAST application, we will have to select from the double bar to the next bar: TAST
  • Click on Add.

Opening the REST Mapping Assistant

The REST Mapping Assistant opens from the Modeling / UML Diagram view. To open it, it is necessary to click on the “magic wand icon” of the toolbar of the diagram, and select the option REST / TAST API.

This assistant will only be opened if the diagram has at least one object, whose adaptor is the WebService Adaptor. Otherwise, the user will be informed.

The assistant will be opened in a pop-up window. Before being launched, the diagram will be saved, and later, the edition will be blocked. Example:

Once the assistant is closed (pop-up window), the mapping data of the diagram will be updated and unlocked, so that it can continue to be edited.

Views:

Object View:

From this view is possible to select the object with which we want to work. Only objects mapped with the WebService adaptor can be selected.

Once an object has been selected, the mapped values for that object will be displayed. These values can be edited.

Message View:

From the message view you can select one of the direct messages that arrive at the object that we have previously selected.

The mapped values for that message are shown, as long as the message has been mapped with a predefined function. Otherwise, all input fields will appear empty.

The sub-section Assertion, will show the data of the assertion associated with the selected message, if it exists. Otherwise, the input fields for the assertion will be disabled.

Actions:

Runs the selected message. It presents the user with the results of the execution. Example:

The message named getRest has been executed. You can see the input parameters associated with that message.

The result of the execution is shown in the Result subsection.

The Headers and Body tabs present the data received after executing the request.

Below is the status of the request, the response time and the size it occupies.

Runs the assertion associated with the selected message.

The result of the assertion is presented in the tab “Output parameters”.

By the moment, there are no specific assertions defined for REST messages. It is therefore necessary that said assertion functions have at least two parameters: the first will be the value of the stepResult, and the second will contain the value of the result of the execution of the request.

For the other parameters of the function, it is possible to give a value from the tab “Input variables” of the sub-section Assertion.

Allows to save the edited data.

Functionality:

Predefined functions:

Messages can have three types of predefined functions associated:

  • REST technology functions: allow to send REST requests
  • Authentication functions: allow to change the authentication used during REST requests
  • Value query functions: allow to obtain a value or property, based on the response of a previously sent REST request.

REST technology functions

Allow the sending of REST requests of type: GET, POST, PUT and DELETE.

Input parameters for REST requests

  • Variable output: indicates the name of the variable where the request output response will be saved
  • Resource: indicates the endpoint on which the REST request will be made. Example:

  • Rest of parameters of the requests: depending on the type of request, some input parameters will be enabled and will be displayed in the Parameters section, put in Message / Request.

In this section, each of the input fields of each type of REST request will be enabled:

  • WS Parameters (request parameters)
  • Headers (request headers)
  • Body (body of the request)

By clicking on each text field, the tab corresponding to that parameter will open, where its values can be filled. Example:

Clicking on WS Parameters, we can edit these values:

Execution of message

If we click on the button we will send the REST request that we are visualizing.

In the Result section, we can see the data received after executing the request:

  • Headers: shows the headers returned by the REST request
  • Body: shows the body of the message. This body will be presented formatted automatically (supported formats: JSON, XML, HTML or Simple Text)
  • Response metadata: shows the status, time and size of the request. Example:

Authentication functions

Allow to change the authentication used during the REST requests.

Input parameters for authentication requests

  • Text box Auth: is located in Message / Request / Parameters. Summarizes the authentication parameters.

Clicking on this text box the Auth tab will open, where you can edit the values of the authentication parameters. The authentication parameters depend on the type of authentication represented by the selected predefined function. Example:

List of parameters for BasicAuth authentication:

Execution of message

If we click on the button we will send the authentication that we are visualizing, and that will be the one used by the rest of the REST requests.

The authentication to be used for each REST request made can be displayed in the “Authorization set by” field, existing in Message.

When sending an authentication message, this field will be updated, indicating the name of the message responsible for modifying the authentication of future REST requests. Example:
After executing an authentication message, we can see the authentication that will be used for future REST requests:

NOTE: In case that the authentication is provided by the adaptor parameters, it will also be shown by the “Authorization set by” field:

Value query functions

Allow to obtain a value or property, from the response of a REST request sent previously.

Input parameters for the values query functions:

  • Text box Response Name: text box where you specify the response variable on which the query will be made.
  • Text box Value: is located in Message / Request / Parameters. Summarizes the values query parameters.

Clicking on this text box, the Value tab will open, where you can edit the values of the values query parameters.
The values query parameters depend on the type of query that is made. Example:

Parameters for the getJSONElementValueByJsonPath query:

Execution of message

If we click on the button we will send the query, determined by the predefined function selected in the “Request” selector, and the answer on which the query is made, field “Response name”.
The application will present the result of the query in the Value tab, existing in Message / Result.

  • The result of the query will be displayed. Example:

  • In case there is no answer about the query, or there is an error in the query itself, the user will be warned. Example:

Calculation of JSONPath / XPath

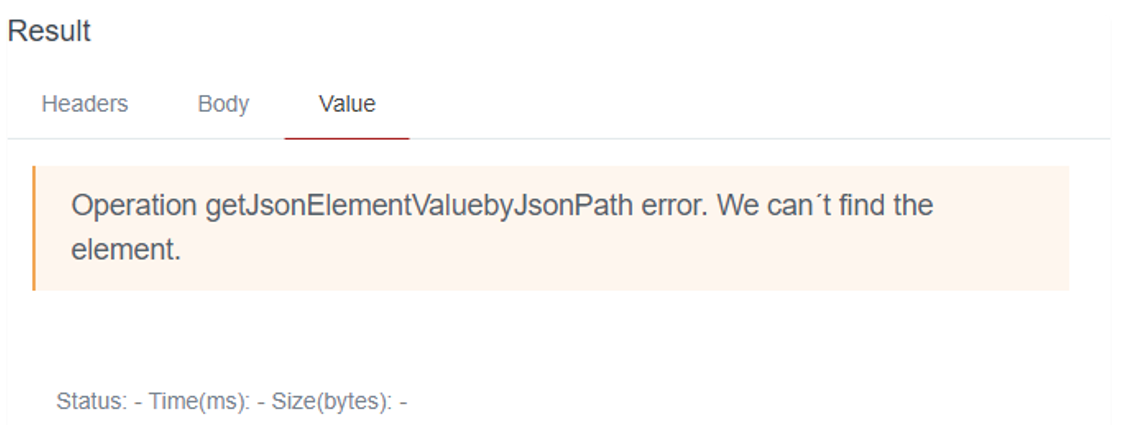
When responding in XML / JSON format, the Xpath or JSONPath can be obtained from the elements of the received response itself, respectively.
From the Body tab, existing in Message / Result, and once a response has been received:

It will be selected, XML or JSON, depending on the type of Path to calculate. The button will be clicked.

In case the answer can not be parsed with the chosen format, a message will be displayed warning of this situation.

In case the answer is correctly parsed, it will be presented in a text box, where you can click on the elements of the answer for which the JSONPath / XPath can be calculated.

The elements on which your JSONPath / Xpath can be obtained, will present a hand when the cursor passes over them.
By clicking on them, the JSONPath / XPath will be presented on the text box immediately below:

The calculated JSONPath / XPath value can be copied to the clipboard by clicking on the button

api_webservice_adaptor.txt · Last modified: 2023/12/18 14:33 (external edit)